Many features can be added to your WorldTracker PLD using Hyper Terminal and the USB cable. We have designed this tutorial for technically sounds people who want to program their own units with advanced features.
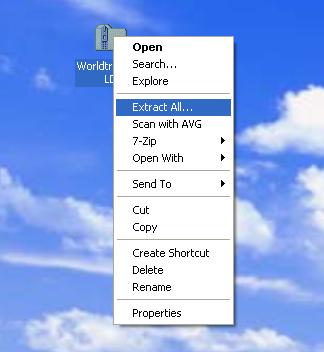
Step 2. Extract WorldTracker_PLD.zip. You can right click the zip file and choose Extract All
Step 3. Open up the expanded folder WorldTracker_PLD.zip and double click on PreInstaller.exe and install the drivers
Step 4. Connect and MiniMT to the USB port of your computer
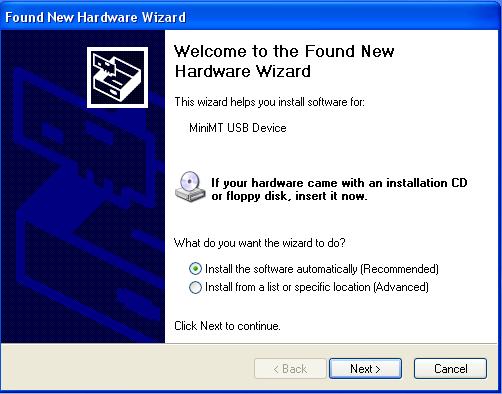
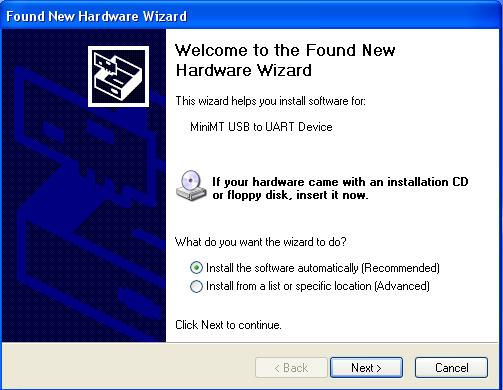
Step 5. When the installer pops up, tell it to automatically search and install device drivers. When a box pops up asking if you wish to install unsigned driver, click continue. This will happen twice.
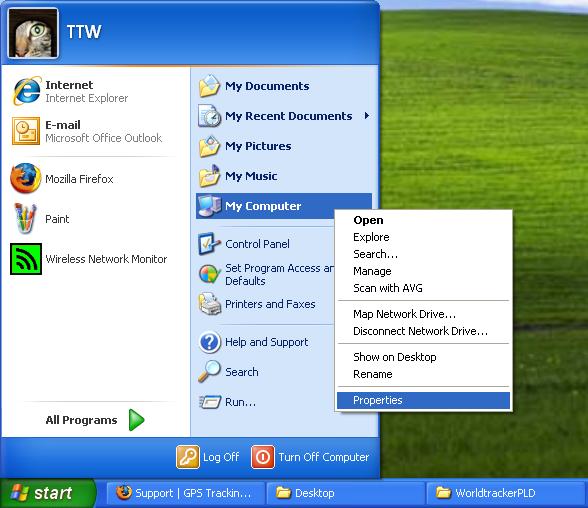
Step 6. Find your MiniMTs COM port. Click on your Windows Start Menu. Right click My Computer then click properties.
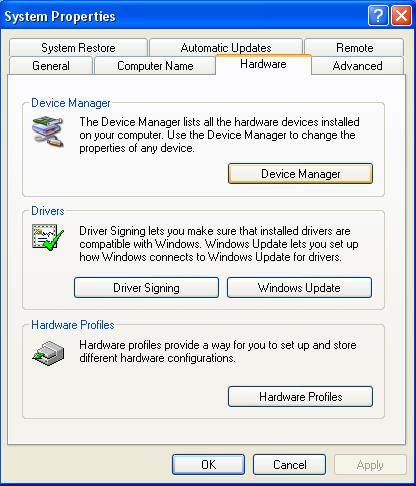
Step 7. Click on the Hardware tab and then on Device Manager.
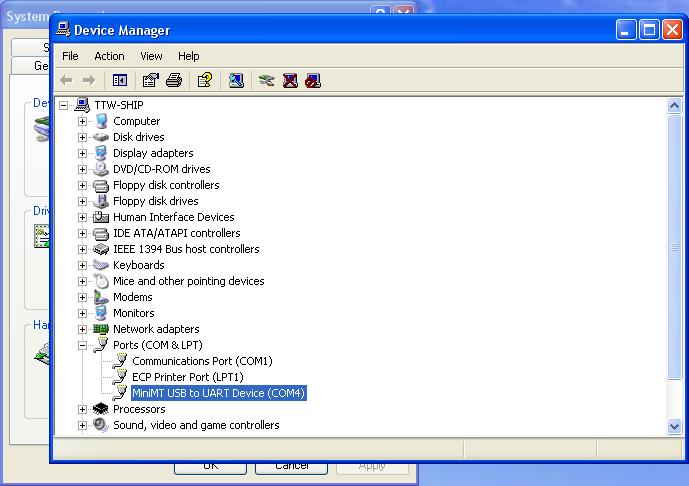
Step 8. Click on Ports and find your MiniMTs Port Number. Ie COM4
Step 9. Open up HyperTerminal. This is located under the start menu under Programs Accessories Communications HyperTerminal
If you do not have HyperTerminal you can download it here. CLICK HERE
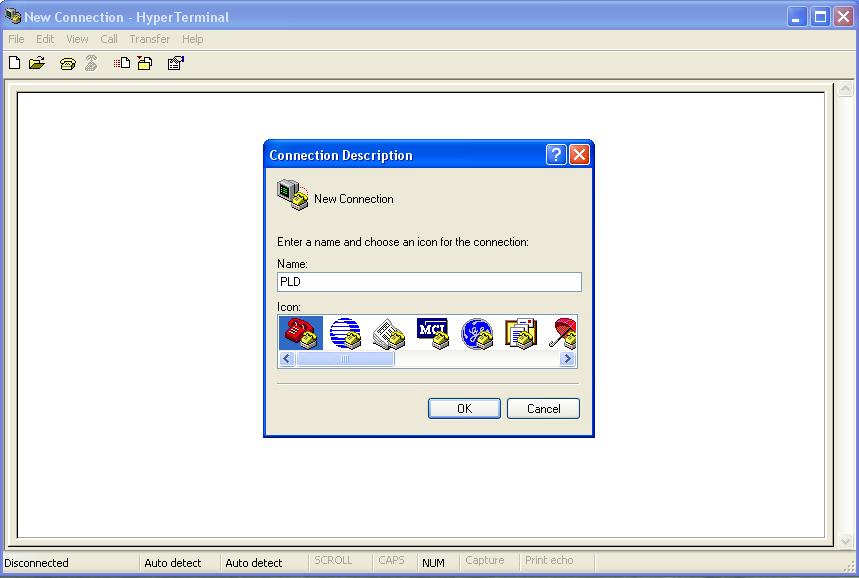
Step 7. Once you open HyperTerminal for the first time, it will ask to become the default telnet client. Click "yes". When the screen prompts you to name your session name it "PLD". Click "OK"
Note: It may ask you to enter a area code. Enter any area code Example: "650"
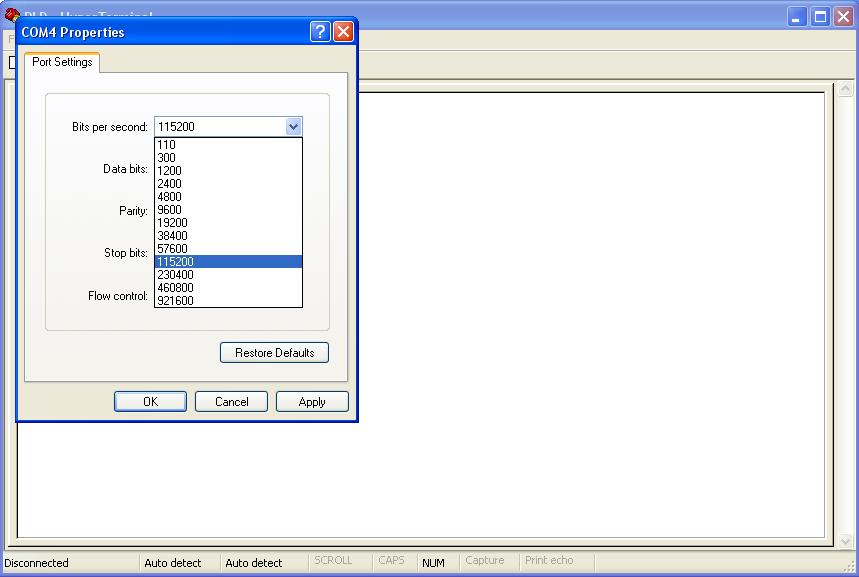
Choose your Com Port under . The Com Port was found in step 8.
The Com Port speed will be 115200bps.
Step 8. Once you have connected to the com port, type AT and hit enter. If everything is correct you will see OK
All commands need to be pasted into this terminal. The standard character rate and line rate are too fast to paste an entire script. Plese go to "File" "Properties" "Settings" "ASCII Setup" and set the Line Delay to "600" and the Character delay to "20". Now you should be able to paste an entire script.
AT$SMSDA=1,"16503070254" // Our GSM Modem
AT$MDMID="0355032" // Modem ID (Name on server)
AT$GOPMD=3,3,2 // GPS Enhanced Mode
AT$WAKETIME=500 // Seconds to stay on before Sleeping
AT$WAKEENBL=4 // Turn Motion Sensor On
AT$FRIEND=1,1,"74.95.207.113" // IP of server to send data via UDP
AT$UDPAPI=,21000 // UDP Port Number
AT+CGDCONT=1,"IP","slogic.t-mobile.com" // APN
AT%CGPCO=1,",",0 // User and pass for apn (Between the first ,",
AT$AREG=2 // Auto register GPRS
//This next set works like this. 100 = Distance, 120 = time. Transmit every 120 seconds (Event Timer 2), but only if it has moved 100 meters.
AT$EVENT=30,1,13,1,1
AT$EVENT=30,2,16,100,1000000 // Distance of 100 m min to update
AT$EVENT=30,3,40,16661,8392710
AT$EVTIM2=120 // Update every 120 seconds (if it has moved 100 meters)
AT$EVENT=12,1,12,1,1 // Set Event 12 (Polling)
AT$EVENT=12,3,40,16661,8392710 // Send via UDP (40)
AT$EVENT=12,3,44,1,0
AT$EVENT=40,1,58,0,0 // Set Event 40 (Panic Button)
AT$EVENT=40,3,40,16661001,4102 // Send via UDP (40)
AT&W // Save
NOTE: Be sure to issue the "AT&W" command so save any changes
To configure the call back feature to call a specific number, issue the following commands. Replace the 00000000000 with the 10 digit phone number with a leading 1.
ie. at$stoatev=10,atd15555551212v;
To use this feature. Click the Poll button from the console and use the "Dial" command. The device will soon call the number that was entered in the step above.
If the device happens to be sleeping you may wish to add these commands for the device to perodically wake up and check for incomming SMS which trigger the dialing command
AT$WAKEENBL=4 = motion activated
AT$WAKETIME=240 = stay on for 240 seconds after wakeintvl (4 min)
AT$MOTTRANS=300 = go to sleep after 300 seconds of no motion (5 minutes)
AT$WAKEINTVL=10 = wake every 10 mniutes to check for any over the air commands
--
The Speaker can be turned off the. The microphone turned to full gain by issuing this command.